Garden Planning for Beginners: How To Start A Garden
How to Plan a Garden Step-by-Step
If you’re thinking about starting a garden and feeling a little overwhelmed, you’re not alone. Planning a garden can feel like a lot, especially when you’re not sure where to begin. Where should the garden go? What should you plant? How much space do you really need? These are the questions I hear all the time, and they’re exactly why having a simple plan makes such a big difference.
For me, winter is when all of this starts to come together. The garden is tucked away, seed catalogs begin showing up in the mail, and my mind is already on next season. This slower time of year is perfect for planning because there’s no rush. You can think things through, make thoughtful decisions, and set yourself up for a smoother spring.
That’s why I created my Garden Planning Starter Kit. It’s a free resource designed to help you organize your thoughts and keep everything in one place as you plan your garden. You don’t need it to use this guide, but if you like writing things down or having a simple place to sketch ideas, it can be a helpful companion as you work through the steps.
In this post, I’ll walk you through how to plan a garden step by step, even if you’ve never gardened before. We’ll cover everything from choosing the right spot and understanding sunlight to creating a layout and building a planting schedule. Take this one step at a time, use what’s helpful, skip what’s not, and let’s make a plan that helps you feel confident heading into the growing season.
Step 1: Know Your Garden Goals
Before you decide what to plant or where your garden will go, it helps to pause and think about what you actually want from your garden this season. This step is easy to skip, but it’s one of the most important parts of planning a garden that feels enjoyable instead of overwhelming.
Your garden goals do not need to be big or complicated. They just need to reflect what matters most to you right now. Maybe you want fresh vegetables for your family, a small herb garden you can step outside and snip from, or a few raised beds with easy crops you know you’ll use. All of those are great goals.
It also helps to be honest about how much time you want to spend in the garden each week. A garden that fits your schedule is much more likely to stay fun as the season goes on. If you know your weeks are busy, a smaller, simpler garden is often the better choice. You can always add more later.
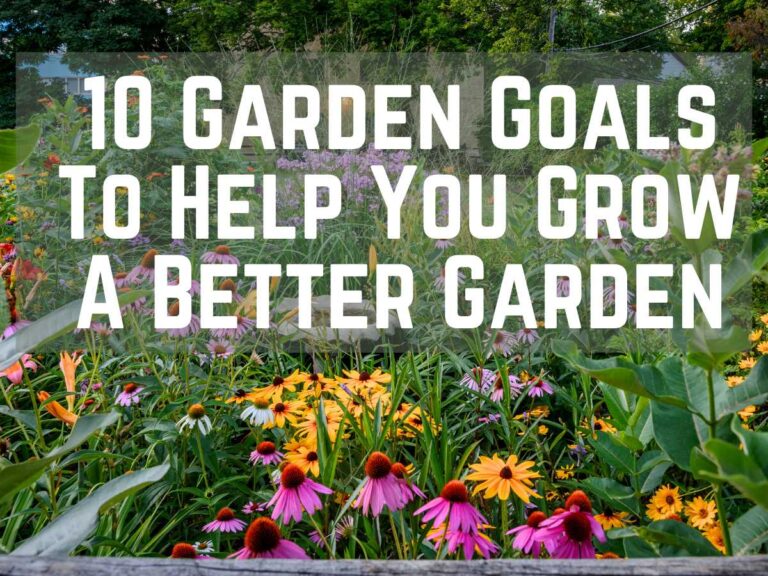
If you’d like more help thinking through this step, I put together a separate post that walks you through some realistic, important garden goals in more detail. You can read it here:10 Simple Garden Goals For a Successful Season. Sometimes it’s helpful to work through your goals before creating a plan. If that’s you, check out that post (the link opens in a new window) and then come back here when you’re ready to move onto planning.
As you think through your goals, try to narrow your focus to just a few priorities. Choosing three to five plants you’re most excited to grow is a great place to start. This keeps planning manageable and makes it easier to stay on track once planting season arrives.
If it helps to write things down, this is a good point to jot a few notes about what you want your garden to give you this year. Having that clarity early on will guide every decision you make in the next steps and help your garden feel calm and intentional from the start.
Step 2: Understand Your Sunlight and Location
Once you know what you want from your garden, the next step is figuring out where it will grow best. This comes down to one main thing: sunlight. Sunlight affects what you can grow, how well plants perform, and how much frustration you’ll run into later in the season.
A simple way to start is to walk around your yard and notice how the light changes throughout the day. Pay attention to which areas get morning sun, which areas stay sunny into the afternoon, and which spots are shaded most of the time. You do not need to track this perfectly. Even a general sense of where the sun falls is helpful.
Most vegetables need at least six hours of direct sunlight each day. This is what we usually call full sun. Areas that get four to six hours of sun are considered part sun or part shade, and areas with less than four hours of direct sun are shade. Knowing this helps you make smarter choices about where your garden goes and what you plant in it.
When choosing a location, it also helps to think beyond this season. A spot that is easy to reach, close to a water source, and visible from your house is much more likely to stay maintained. Gardens tucked far away or hidden behind other projects often get neglected, especially during busy weeks.
If it helps, you can jot down a few notes about where the sun hits your yard and which areas feel like the best fit for a garden. Having that clarity now will make the next steps feel easier and prevent a lot of guesswork once planting time arrives.

Step 3: Learn Your Growing Zone and Frost Dates
Once you know where your garden will go, the next step is understanding your growing zone and your frost dates. These two pieces of information are often talked about together, and that’s where a lot of confusion comes in for new gardeners.
Your growing zone is based on your average winter temperatures. It tells you how cold your area typically gets and helps determine which plants can survive year after year. This is especially important for perennials, shrubs, trees, and overwintering plants. Your zone helps answer the question, “Will this plant survive the winter where I live?”
In many online gardening spaces, you’ll hear people talk about their garden zone when they’re deciding when to start planting in spring. This is where things can get a little misleading. Your garden zone does not determine when it’s safe to plant outdoors.
That timing is based on your frost dates.
Your average last frost date in spring tells you when it’s usually safe to plant tender crops outside without the risk of frost damage. Your first frost date in fall gives you an idea of how long your growing season lasts. These dates are what guide planting schedules for vegetables, annual flowers, and many herbs.
This article from the Farmer’s Almanac explains the difference between garden zones and frost dates in more detail. They also have a U.S. plant hardiness map and a tool for looking up your zone and frost dates. Once you have that information, it becomes something you’ll come back to year after year. It takes a lot of the guesswork out of timing and helps you plan with more confidence.
If it helps, this is a good time to write down your zone and your average frost dates so you have them in one easy place. Knowing the difference between these two now will make planting decisions much clearer as the season approaches.
Step 4: Choose the Right Type of Garden Bed
Once you understand your sunlight and your timing, it’s time to decide what type of garden bed makes the most sense for you. This is another area where it’s easy to feel like there’s a “right” answer, but the truth is that there are several good options. The best choice is the one that fits your space, your time, and your energy.
An in-ground garden is planted directly in the soil in your yard. This is often the least expensive option and works well if you already have decent soil and enough open space. In-ground gardens can grow a lot of food, but they may require more initial prep, especially if your soil is compacted or weedy.
Raised garden beds are built above ground and filled with soil. Many beginners like raised beds because the soil is easier to control and the beds tend to drain well. They can also be easier on your back and knees. Raised beds do require an upfront investment, but they often feel more manageable and organized, especially in the early years.
Related – DIY Raised Bed Soil Recipe
Container gardens are a great option if you’re short on space or want to keep things very simple. Pots, grow bags, and planters can be placed on patios, decks, or even sunny driveways. Containers dry out more quickly than other garden beds, so they need regular watering, but they are flexible and easy to adjust as the season goes on.
As you choose a garden bed, think about what feels realistic for this season. Consider how much time you want to spend gardening, how close the garden will be to your house, and how easy it will be to care for on busy weeks. Starting small is not a setback. It’s a smart way to build confidence and enjoy the process.
Remember, your garden can change over time. Many gardeners start with one type of bed and add others later as they learn what works best for them. Choosing the right garden bed now sets a solid foundation and makes the rest of the planning process feel much easier.

Step 5: Plan Your Garden Layout
Once you’ve chosen your garden bed, the next step is planning how everything will fit together. Having a basic layout helps prevent overcrowding and makes your garden easier to care for as the season goes on.
Start by measuring your garden space or the size of your beds. Even a rough measurement is helpful. Knowing how much room you have makes it easier to choose the right number of plants and avoid trying to squeeze in too much.
Spacing matters more than many beginners realize. Plants that are crowded together compete for sunlight, water, and nutrients, which can lead to poor growth and more disease issues. Giving plants the space they need helps them stay healthier and more productive throughout the season.
As you plan your layout, think about grouping plants with similar needs. Plants that like the same amount of sunlight and water tend to do better when they’re planted together. It also makes caring for your garden simpler and more efficient.
Plant height is another thing to consider. Taller plants can shade smaller ones if they’re placed too closely. Keeping taller plants toward the back of beds or on the north side of a garden helps make sure everything gets enough light.
Your layout does not need to be perfect. It’s simply a starting point. Many gardeners adjust their layouts as they learn what works best in their space. A simple, realistic plan will serve you much better than an overly complicated one and will help your garden feel more manageable from the very beginning.
Step 6: Make a Plant List
Before you start buying seeds or plants, it helps to take a step back and decide exactly what you want to grow. Making a plant list ahead of time keeps planning intentional and helps prevent impulse purchases that can quickly turn into overwhelm.
Start by keeping your list short and focused. Choose plants that match the sunlight you have, fit into your planned layout, and are things you actually enjoy eating or looking at. It’s easy to get excited at the garden center, but a smaller, well-thought-out list usually leads to a more successful and enjoyable season.
As you build your list, think about how large each plant will get and how it grows. Some plants spread out, others grow tall, and some stay compact. Keeping growth habits in mind will help you avoid overcrowding and make better use of your space.
Fewer plants often lead to better results, especially for beginners. When you’re not trying to care for too many things at once, it’s easier to stay consistent with watering, harvesting, and general maintenance. You’ll also have more time to notice what’s working well in your garden.
Remember, your plant list is not set in stone. You can always add plants later if you have extra space or feel ready for more. Starting with a thoughtful, realistic list sets your garden up for success and helps the season feel calm and manageable from the start.
Step 7: Gather Supplies and Prepare Your Soil
Before planting anything, it’s worth taking a little time to think about your soil. Healthy soil is the foundation of a successful garden, but this step does not need to be complicated or overwhelming.
Your starting point will depend on how you’re gardening. In-ground gardens often need some loosening and cleanup before planting. Raised beds are usually filled with a soil mix designed for good drainage and root growth. Containers rely entirely on the soil you put in them, so using a quality potting mix is important. No matter which option you’re using, the goal is the same: soil that drains well and gives plant roots room to grow.
It helps to remember that soil improvement is a process. You do not need perfect soil before you can have a good garden. Simple steps like removing weeds, loosening compacted areas, and adding organic matter can make a big difference over time. Working with what you have now is far better than waiting for everything to feel ideal.
If you want a deeper, step-by-step walkthrough of how to improve your garden soil before planting, I’ve written a separate post that walks through that process in detail. You can read it here:
How to Improve Garden Soil Before Planting
As you prepare, think about the basic supplies you may need, such as soil amendments, compost, mulch, or containers. Keeping your list short and focused helps avoid unnecessary purchases and keeps planning manageable.
If it helps, this is also a good time to jot down a few notes about your soil or any supplies you want to gather before planting. Having a simple plan for soil prep now will make planting feel easier and help your garden get off to a strong start.

Step 8: Create a Planting Schedule
Once you’ve planned your space, chosen your plants, and prepared your soil, it’s time to think about when everything will be planted. Having a simple planting schedule helps prevent rushed decisions and makes the season feel much more manageable.
A planting schedule does not need to be strict or detailed. It’s simply a way to spread planting tasks out instead of trying to do everything at once. When you know what needs to be planted and roughly when, it takes a lot of pressure off during busy spring weeks.
There are three main ways plants get into the garden. Some seeds are started indoors ahead of time. Others are planted directly into the garden once the soil warms up. Some plants are purchased as seedlings and transplanted outside. Knowing which category each plant falls into helps you plan your timing more confidently.
This is where your frost dates come back into play. Your average last frost date helps guide when it’s safe to move plants outdoors or direct sow seeds. Planning around that date helps protect young plants and sets them up for a stronger start.
It also helps to remember that planting does not have to happen all in one weekend. Many gardens are planted in stages over several weeks. Spreading things out makes the work feel lighter and gives you time to adjust if weather or schedules change.
If it helps, you can jot down rough planting dates or notes about when you plan to start seeds or plant outdoors. Having those reminders in one place can make the season feel calmer and help you stay on track without feeling rushed
Final Thoughts: Bringing Your Garden Plan Together
Planning a garden does not need to be complicated or perfect to be effective. Taking the time to think things through ahead of planting helps the entire season feel easier, calmer, and more enjoyable. Even a simple plan gives you direction and confidence as the garden grows.
If you find yourself needing to revisit any part of the process, that’s completely normal. Garden plans evolve as you learn more about your space, your schedule, and what you enjoy growing most. Adjusting along the way is part of gardening, not a mistake.
If it helps to have a place to keep all of your notes, ideas, and plans together, you can use my Garden Planning Starter Kit as a simple companion to this guide. It’s designed to give you space to think things through without pressure or overwhelm.
You may also find it helpful to revisit your garden goals as the season approaches. I’ve shared more about that process in my garden goals post, which walks through how to set goals that actually fit your life and your time.
And if you’re ready to take your plan one step further, I’ve also put together a guide on how to design your garden layout in a simple, realistic way. It walks through spacing, placement, and how to turn your ideas into a layout that works in your actual space.
Once your garden is planned, you can move into the growing season with a lot more confidence. When the time comes, my month-by-month gardening guides are there as a gentle reference to help you stay on track without feeling overwhelmed.
However you move forward, remember that gardening is something you learn by doing. A thoughtful plan gives you a strong starting point, and everything builds from there.

Hi, I’m Liz! I’m a Master Gardener, Garden Coach, and Professional gardener. I’m also a mom of 4 who likes to putz around in my garden, growing food and flowers. You can read more about me here.
I started Learn To Grow Gardens as a resource for anyone looking to find more success in the garden. You can find gardening help, inspiration, and community through my Facebook Group or by joining my email list below.